Fire Investigations Release Notes - November 2025
NEW FEATURES
Create a new setting for Custom Status
What - A new Custom Status configuration has been added under Field Management, allowing agencies to create their own investigation statuses in addition to the platform's standard lifecycle statuses (Not Started, In Progress, Pending Authorization, and Authorized). Users can define custom status names, associate them with standard statuses, and manage their active state through a dedicated interface that includes options to create, edit, activate, and delete custom statuses as needed.
Why - This enhancement was implemented due to customer request to support variations in agency workflows and compliance requirements that extend beyond the standard investigation lifecycle, enabling organizations to better align the system with their specific operational procedures and documentation standards.
How - To configure Custom Statuses:
Navigate to
Field Management and locate the new
Custom Status section
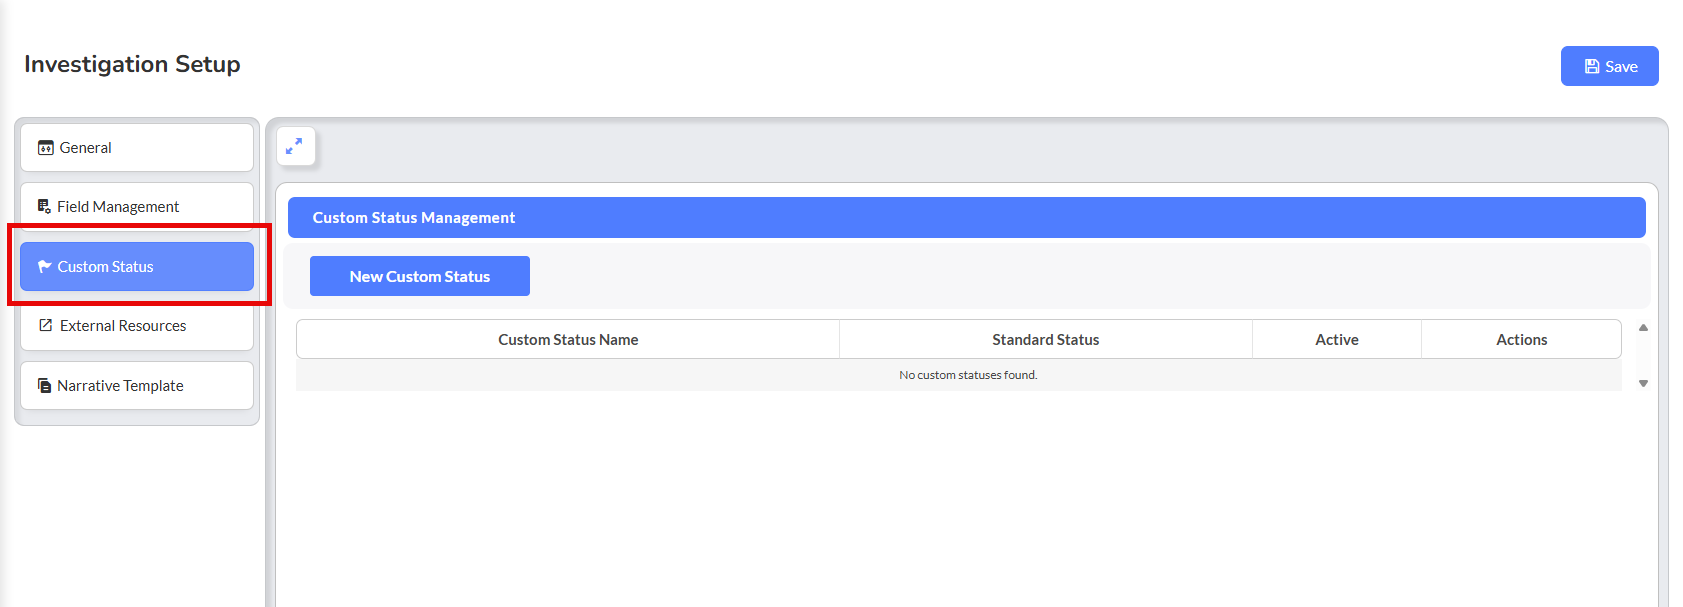
Click New Custom Status to open the configuration modal
Enter a
Custom Status Name (letters and spaces only, maximum 50 characters)
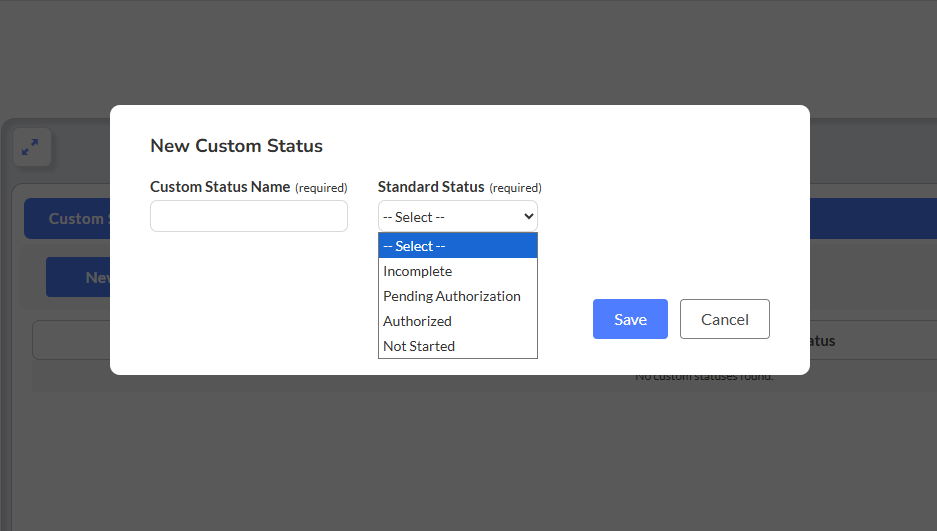
Select a Standard Status to associate with the custom status from the dropdown menu
Click Save to create the custom status
Use the Active checkbox in the list to enable or disable custom statuses
Use the
Actions column to
Edit or
Delete custom statuses as needed
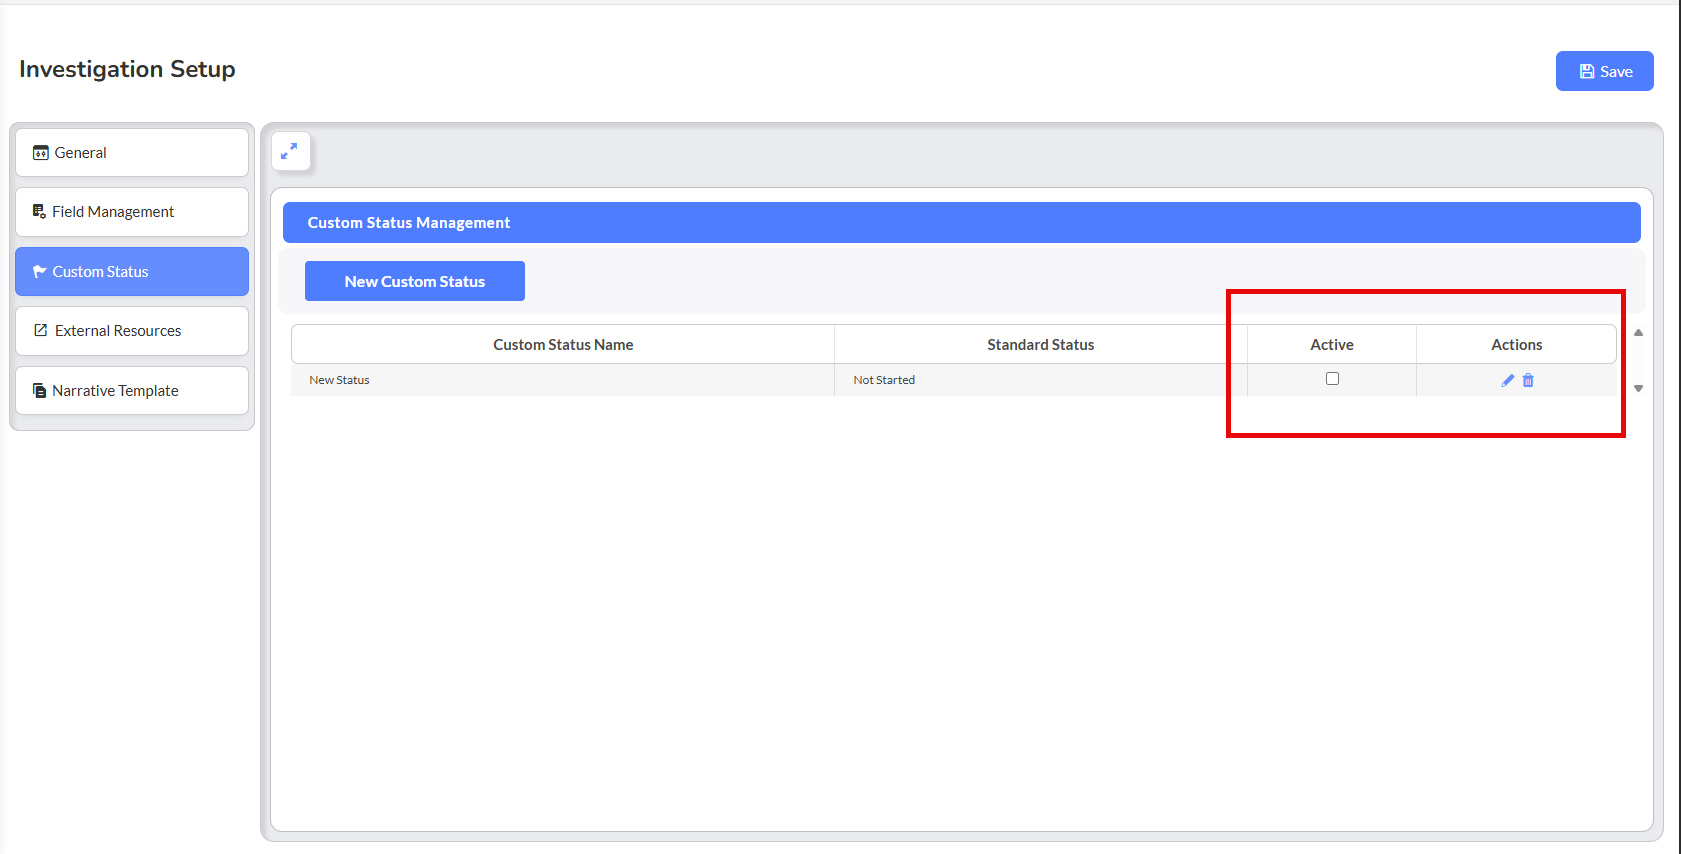
Note: Only one custom status can be active per standard status at a time; activating a new custom status will automatically deactivate any other status linked to the same standard status
Note: Custom statuses cannot be deleted if they are currently assigned to any Fire Investigation records
Use Case - An agency requires an additional review step in their investigation workflow between "In Progress" and "Pending Authorization" called "Supervisor Review." The Fire Investigation administrator creates a new custom status named "Supervisor Review" and associates it with the "In Progress" standard status. Once activated, investigators can now select "Supervisor Review" as a status option when updating their investigation records, and this custom status appears in the Status column and filter dropdown on the Fire Investigation list page, allowing supervisors to quickly identify investigations awaiting their review. The custom status also appears on printed reports generated through Form Builder, ensuring complete documentation of the investigation's progress.
What - A new + Add Signatory component has been introduced in the Findings section, enabling users to dynamically add multiple signature blocks to Fire Investigation records. Each signature block includes the User Signing section with the user's name (autopopulated), a signature component with Fill option support, and an Investigator Qualifications field, allowing unlimited additional signatories to be added as needed with the ability to delete any non-default signature blocks.
Why - This feature was developed due to customer request to provide flexibility for investigations requiring multiple investigator sign-offs, ensuring that complex cases involving multiple personnel can be properly documented with all necessary signatures and qualifications within a single investigation record.
How - To add additional signatures to a Fire Investigation:
Navigate to the Findings tab within an open Fire Investigation record
Click the
+ Add Signatory button to create a new signature block
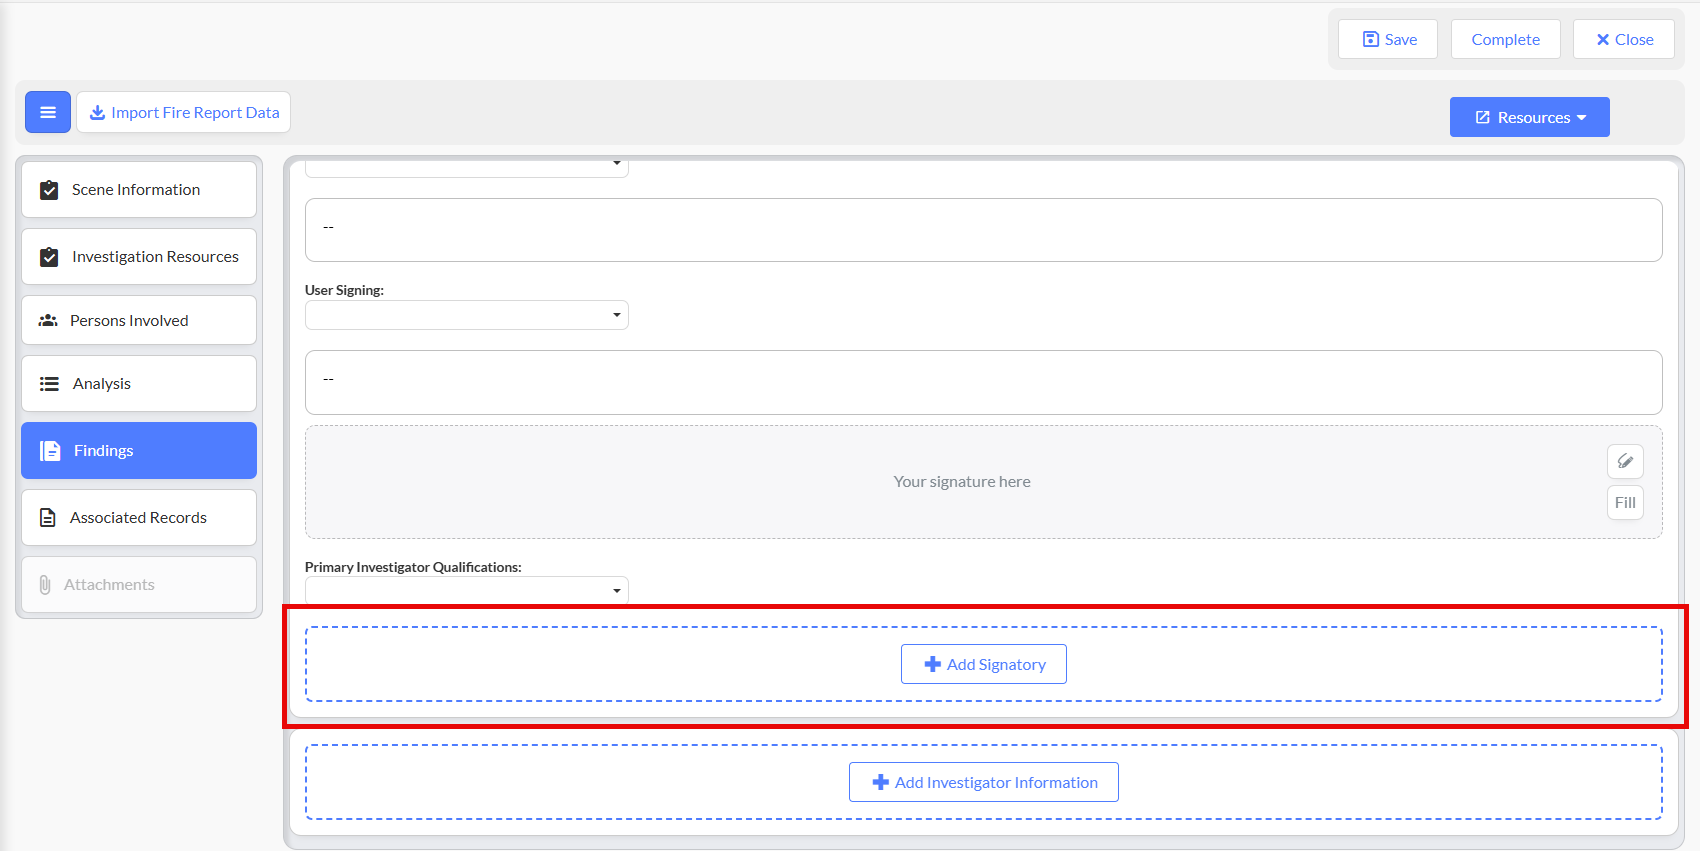
The system will automatically generate a new User Signing section with the current user's name populated
Complete the Investigator Qualifications field by selecting the appropriate qualification from the dropdown
Use the Fill option in the Signature component to autopopulate your stored signature if desired
Click + Add Signatory again to add more signature blocks as needed for additional investigators
To remove a signature block, click the
Delete button next to any non-default User Signing section

Note: If all User Signing blocks are deleted before saving, the form will automatically regenerate a single empty User Signing block upon save
Note: All added signatures will appear in printed reports via Form Builder
Use Case - A complex arson investigation requires sign-off from the lead investigator, a fire marshal, and a specialized forensic investigator. The lead investigator opens the Fire Investigation record and navigates to the Findings tab, where they complete their signature block including their qualifications as "Certified Fire Investigator." They then click + Add Signatory twice to create two additional signature blocks, one for the fire marshal and one for the forensic specialist. Each investigator can later access the record, locate their respective signature block, select their qualifications, and apply their signature using the Fill option. When the investigation report is printed, all three signatures appear with their associated names, qualifications, and contact information, providing complete documentation of the multi-investigator review process.
ENHANCEMENTS
[List] Add Fire Zones, and Inspection Zone to List Columns and Search
What - The Fire Investigation list view has been expanded to include two new geospatial columns: Inspection Zone and Response Zone. These columns support multi-select filtering, full sorting capabilities (ascending, descending, alphabetical), and enhanced search functionality to help agencies better manage investigations and analyze geographic trends within their jurisdiction.
Why - This enhancement was implemented due to customer request to improve the ability to filter, search, and sort investigations based on zoning data, enabling more efficient geographic analysis and resource allocation for fire investigation activities.
How - To utilize the new zone columns:
Navigate to Fire Investigations and access the list view
Locate the Inspection Zone and Response Zone columns in the list display
Click on either column header to sort investigations by zone (ascending, descending, or alphabetical order)
Use the filter dropdown for Inspection Zone or Response Zone to select multiple zones and narrow your investigation list
Apply the search functionality to quickly locate investigations within specific zones
Note: The print layout and functionality remain unchanged; these new columns do not affect printed reports
Use Case - A fire investigation supervisor needs to review all open investigations in the downtown response zone to allocate additional resources for a busy period. They navigate to the Fire Investigation list view, click on the Response Zone filter dropdown, and select "Downtown Zone" to display only investigations in that area. They then sort by the Inspection Zone column to further organize the results by inspection districts within the downtown area. This filtered view allows the supervisor to quickly identify which investigators are handling cases in specific geographic areas and determine where additional support may be needed without having to open individual investigation records.
Improve Vehicle API by VIN
What - The Fire Investigation module now includes vehicle identification lookup functionality that mirrors the existing behavior in the Assets module, allowing investigators to pull accurate Make, Model, and Model Year data directly from a VIN number. New vehicle fields have been added to the Scene Information → Vehicle → Vehicle subsection, including VIN (with a VIN Lookup button), License Plate, Make, Model, and Model Year, with validation rules to ensure data integrity and an overwrite modal to control which fields are updated.
Why - This enhancement was implemented due to customer request to improve efficiency and consistency in vehicle data entry by enabling investigators to leverage existing apparatus data rather than manually entering vehicle details, reducing errors and saving time during the investigation process.
How - To use the VIN Lookup functionality:
Open a Fire Investigation record and navigate to Scene Information → Vehicle → Vehicle subsection
Ensure the Scene Type is set to Vehicle (this functionality is only available for vehicle scenes)
Enter the 17-character VIN in the VIN field
Click the
VIN Lookup button (enabled only after a VIN is entered)

Review the modal displaying all vehicles matching the entered VIN from
Assets → Apparatus
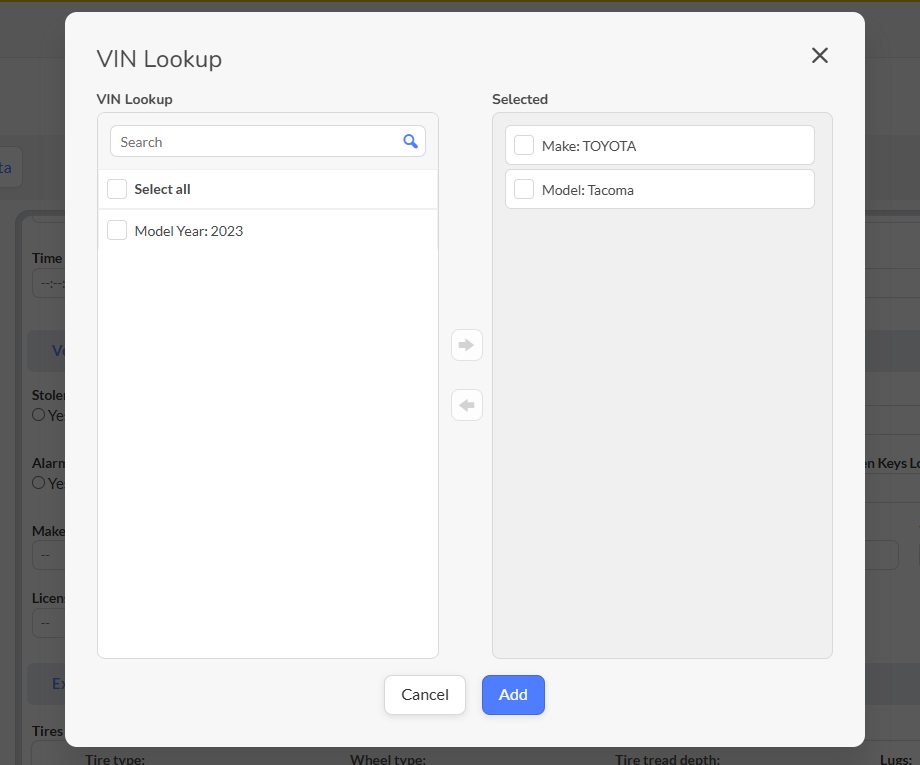
Select the desired vehicle from the list and click Add (the Add button remains disabled until a vehicle is selected)
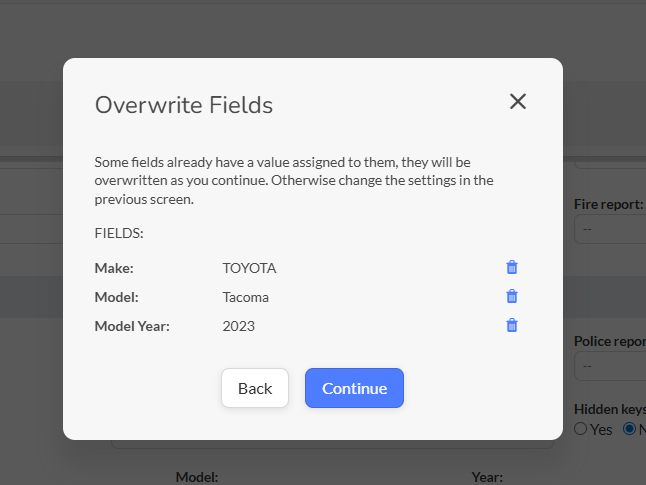
In the Overwrite Fields modal, review the fields that will be updated (Make, Model, Model Year)
Remove any fields you do not wish to update by deselecting them
Click
Continue to apply the data to the Fire Investigation Vehicle form
Note: For records in Pending Authorization status, users can perform VIN Lookup but cannot save the form
Note: For Authorized records, all fields are read-only and VIN Lookup is disabled
Note: VIN data appears in Print Reports via Form Builder
Use Case - An investigator responds to a vehicle fire involving a fleet vehicle owned by the fire department. At the scene, they note the VIN from the dashboard plate. Back at the office, they open the Fire Investigation record, set the Scene Type to "Vehicle," and enter the VIN "1HGBH41JXMN109186" in the VIN field. Upon clicking VIN Lookup, the system displays the matching vehicle from the apparatus database: a 2015 Honda Accord. The investigator selects this vehicle and clicks Add, then reviews the Overwrite Fields modal showing Make: Honda, Model: Accord, and Model Year: 2015. They click Continue, and these fields automatically populate in the investigation record, ensuring accurate vehicle information without manual entry and eliminating potential transcription errors in the investigation documentation.
[Seattle] Improve the path for CQ to include subsections
What - The Custom Questions (CQ) setup has been enhanced to allow users to place custom questions within more granular subsections of the Fire Incident Data area using a hierarchical path format (Tab | Section | Subsection). This improvement enables precise placement of newly created fields in their appropriate locations, such as under Property Information instead of Weather Conditions, and applies to new custom questions only while leaving existing CQs in their current locations.
Why - This enhancement was implemented due to customer request to ensure that newly created custom fields appear exactly where they belong within the investigation form structure, resulting in cleaner organization, improved usability for end users, and more logical grouping of related data fields.
How - To create Custom Questions with specific subsection placement:
Navigate to Field Management → Custom Questions
Click New Custom Question to create a new field
In the Section field dropdown, select from the hierarchical paths displayed in the format: Tab | Section | Subsection
Choose the appropriate subsection for your custom question, such as Scene Information | Fire Incident Data | Property Information
Complete the remaining custom question configuration fields as normal
Click Save to create the custom question in the selected subsection
Note: This hierarchical selection applies only to new Custom Questions; existing CQs remain in their current locations
Note: Editable, unused CQs can be updated to a new subsection if needed
Note: The Print Report now displays custom questions in their selected section/subsection paths correctly
Use Case - A fire investigation administrator needs to create a custom question to capture "Foundation Type" information for structure fires. Previously, they would select "Fire Incident Data" as the section, but the field would appear at the top of the form alongside weather conditions, causing confusion for investigators. With the enhanced Custom Questions setup, they navigate to Field Management → Custom Questions, click New Custom Question, and select the section path Scene Information | Fire Incident Data | Property Information from the dropdown. After completing the field configuration and saving, the new "Foundation Type" question now appears logically grouped with other property-related fields in the Property Information subsection, making it easier for investigators to locate and complete during their assessment of structure fire scenes.
Update OpenWeather API to pull in °F vs °C on address lookup
What - The OpenWeather integration has been enhanced to ensure temperature values populate in the correct scale (°C or °F) when entering locations manually, using the same logic applied for auto-populated locations. When the Fire Department (FD) module setup is disabled, the system now uses the country code to determine the correct temperature scale, with US defaulting to Fahrenheit and CA defaulting to Celsius, and automatically updates displayed temperatures when settings change.
Why - This enhancement was implemented due to customer request to ensure consistent temperature scale behavior regardless of whether addresses are manually entered or auto-populated, and to provide accurate temperature representation out of the box for clients without the FD module enabled, eliminating confusion and manual conversion requirements.
How - To utilize the improved temperature scale functionality:
Navigate to a Fire Investigation record and access the Scene Information → Weather Conditions section
Manually enter an address in the location field
The system will automatically apply the appropriate temperature scale (°C or °F) based on your Fire Department setup configuration or country code
If your agency uses the FD module, temperature scale follows your department's configured preference
If your agency does not have the FD module enabled, temperature scale is determined by country code: US = Fahrenheit (°F) and CA = Celsius (°C)
When temperature settings or configuration values change, the displayed temperature will update automatically
Note: Values greater than 220 (in either scale) are not allowed and will automatically clear
Note: Temperature values and units are captured in Print Reports
Note: Import Fire Report Data functionality continues to work with proper unit conversion applied during the import process
Use Case - A fire investigation agency in California without the Fire Department module enabled is documenting a wildfire investigation. The investigator manually enters the incident address "123 Mountain View Road, Sacramento, CA" in the location field within the Weather Conditions section. The OpenWeather integration automatically recognizes the CA country code and populates the temperature as "38°C" rather than requiring the investigator to manually convert from Fahrenheit or question which scale is being used. When the investigation report is printed, the temperature displays correctly as "38°C," ensuring accurate documentation that aligns with the agency's standard practices and eliminates any confusion about temperature values during the investigation review process.
[Seattle] Add Investigator Qualification for Primary Investigator and any additional investigator
What - A new Investigator Qualifications list field has been added to the Findings tab, allowing agencies to capture qualification details for the primary investigator as well as any additional investigators added to the record (secondary, additional, etc.). The qualification values are fully customizable through Field Management, and the field appears in the User Signing Signature section for the primary investigator, within the signatory block for secondary investigators, and in the Add Investigator Information modal for additional investigators.
Why - This enhancement was implemented due to customer request to enable proper documentation of investigator credentials and certifications for all personnel involved in an investigation, ensuring compliance with reporting requirements and providing complete qualification information for all signatories on investigation reports.
How - To configure and use Investigator Qualifications:
Navigate to Field Management → List Values and locate Investigator Qualifications
Add, edit, or remove qualification values as needed for your agency (e.g., "Certified Fire Investigator," "Fire Marshal," "Forensic Specialist")
Save your changes to make the values available throughout the module
To assign qualifications in a Fire Investigation, open a record and navigate to the Findings tab
For the primary investigator, locate the Investigator Qualifications field in the User Signing Signature section and select the appropriate qualification from the dropdown
For a secondary investigator, add a signatory block and complete the Investigator Qualifications field that appears in the new signatory section
For additional investigators (more than two), the qualifications field appears within the Add Investigator Information modal using the same customizable values
Note: A new Print Component titled "Investigator Qualifications" displays in printed reports as a table containing Agency Name, Investigator Name, Investigator Qualifications, and Signature
Use Case - A multi-jurisdiction investigation involves three investigators with different qualification levels: the primary investigator is a Certified Fire Investigator (CFI), a secondary investigator is a Fire Marshal, and a third investigator is an Assistant Fire Investigator in training. The Fire Investigation administrator first configures the qualification options in Field Management by adding "Certified Fire Investigator (CFI)," "Fire Marshal," and "Assistant Fire Investigator" to the Investigator Qualifications list. When documenting the investigation, the primary investigator opens the record, navigates to the Findings tab, and selects "Certified Fire Investigator (CFI)" from the Investigator Qualifications dropdown in their User Signing section. They add a secondary signatory block for the Fire Marshal, who later selects "Fire Marshal" in their qualifications field. Finally, they add the third investigator through the Add Investigator Information modal, selecting "Assistant Fire Investigator" for their qualification. When the investigation report is printed, the Investigator Qualifications table displays all three investigators with their respective names, qualifications, agencies, and signatures, providing complete credentialing documentation for the investigation review board.
Adjust Audit Log for UI Business Actions in Fire Investigations Module
What - The audit logging system within the Fire Investigations module has been expanded to include comprehensive coverage of business actions that were previously missing from audit logs. New log entries now capture Fire Investigation actions (Started, Viewed, Created, Saved, Printed, Attachments Viewed), Fire Investigation Setup actions (Accessed, Saved), Fire Investigation Form actions (Created, Updated, Deleted), and Fire Investigation List actions (Downloaded), with improved log context that displays associated Fire Investigation IDs and Form Builder IDs where relevant.
Why - This enhancement was implemented due to customer request as part of the Platform team's ongoing initiative to introduce comprehensive audit logging across all modules, ensuring complete traceability of user actions and system changes for compliance, security monitoring, and operational transparency.
How - To access and review Fire Investigation audit logs:
Navigate to System Administration → Audit Logs (or your agency's designated audit log location)
Use the filter options to select Fire Investigations as the module
Review the expanded audit log entries, which now include:
Fire Investigation Started - logged when a user opens a Not Started investigation by clicking the Play button
Fire Investigation Viewed, Created, Saved, Printed, Attachments Viewed - with associated Fire Investigation ID displayed
Fire Investigation Setup Accessed, Saved - for configuration changes
Fire Investigation Form Created, Updated, Deleted - with related Form Builder ID displayed
Fire Investigation List Downloaded - for list export actions
Filter by user, date range, or action type to locate specific audit events
Note: All audit entries include timestamp, user information, and relevant contextual IDs for complete traceability
Use Case - A Fire Investigation supervisor needs to verify when an investigation record was last accessed and modified by staff members as part of a quality assurance review. They navigate to System Administration → Audit Logs and filter by the specific Fire Investigation ID. The audit log now displays a complete history of actions including when the investigation was Started (user clicked Play button), each time it was Viewed by different investigators, when it was Saved with updates, and when the final report was Printed. Additionally, they can see that a custom form was Updated with the associated Form Builder ID, and that the investigation list containing this record was Downloaded for an external review. This comprehensive audit trail provides complete visibility into who accessed the investigation, what actions they performed, and when these activities occurred, supporting the agency's documentation requirements and accountability standards.
[Seattle] Update location for Floors Above/Below Grade
What - The Floors Above Grade and Floors Below Grade fields have been relocated within the Fire Investigation module from the Building Construction section to the Structure Fire → Type of Occupancy section, where they now appear immediately after the Width field for improved logical grouping and context. The fields maintain full functionality including data import support and availability in Print Reports via Form Builder.
Why - This enhancement was implemented due to customer request to improve the contextual clarity and logical organization of structure-related fields, ensuring that floor information appears alongside other occupancy characteristics where investigators naturally expect to find and document this information during structure fire assessments.
How - To locate and use the relocated fields:
Open a Fire Investigation record with a structure fire scene type
Navigate to Structure Fire → Type of Occupancy section
Locate the Floors Above Grade and Floors Below Grade fields positioned immediately after the Width field
Enter the appropriate floor count information as part of your structure fire documentation
Note: When importing Fire Report Data, fields with existing data will display; clicking Update will map and save the data to the Fire Investigation record
Note: The updated fields are fully available in Print Reports via Form Builder in their new location
Use Case - An investigator is documenting a structure fire at a multi-story apartment building and needs to record the building's floor configuration as part of the occupancy assessment. They open the Fire Investigation record and navigate to Structure Fire → Type of Occupancy to document occupancy characteristics. After entering the building width, they immediately find the Floors Above Grade field and enter "4" for the four stories above ground level, then enter "1" in the Floors Below Grade field for the basement level. This logical placement allows the investigator to complete all occupancy-related building characteristics in one continuous workflow without navigating to a separate Building Construction section, reducing the time required to document structure information and ensuring that floor data is grouped with other related occupancy details in both the form view and printed reports.
Related Articles
Fire Investigations Release Notes - October 2025
Video New Features CAD Integration for Fire Investigation Module What - The Fire Investigation (FI) module now supports automatic creation and population of investigation records from CAD data using the existing NFIRS notification structure. When a ...
Fire Investigations: Release Notes (December 2025)
Enhancements Update Save/Add Behavior in Persons Involved What We enhanced the Persons Involved section to improve usability, consistency, and data protection. The header is now sticky, keeping critical fields and actions visible while scrolling, ...
Fire Incident Documentation Release Notes: November 2025
New Features Implement Unit Actions Behavior for Aiding Apparatus in NERIS What - NERIS now properly handles Actions Taken for Aiding Apparatus, ensuring that deleting apparatus with incomplete action data no longer triggers invalid validation errors ...
ePCR Release Notes - Novemeber 2025
New Features OneDose - Integration and consumption of data for OneDose What - This feature introduces integration with OneDose, a medication dosing calculator platform that enables ePCR to import patient-specific medication dosing calculations and ...
Health & Wellness Release Notes - November 2025
New Features Update Import Data Tool to Pull in Training Data What - The Import Data tool has been expanded to include Training data alongside Fire Incident data, with the tool renamed from "Import Fire Report Data" to "Import Internal Data." Users ...